Ceiling Paint
Ceiling Paint – Smooth, Low-Glare Finishes for Aussie Homes
Refresh your rooms with ceiling paint that hides imperfections, reduces glare and delivers a crisp, even finish. From quick stain touch-ups to full-room repaints, this guide helps you choose the right option and apply it like a pro, so your ceilings look brighter and your walls feel sharper.
Shop Our Top Picks
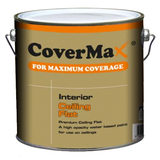
A dependable flat interior ceiling paint designed for smooth coverage and a classic low-glare look. Ideal for living areas and bedrooms when you want a consistent, professional finish.
Why choose it: reliable hide, easy rolling, great for freshen-ups and full repaints.
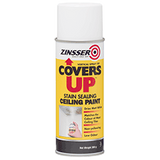
A clever stain-covering ceiling spray for fast spot repairs on water marks, smoke stains or minor discolouration. Its targeted aerosol delivery makes overhead touch-ups simple and tidy.
Why choose it: quick DIY stain fixes without re-coating the whole ceiling.
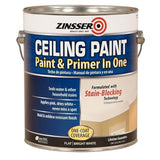
A flat, ceiling-specific topcoat formulated for strong hiding power and a uniform finish. Use it when you want a bright, even ceiling and minimal roller spatter.
Why choose it: clean, flat appearance that helps ceilings recede and rooms feel taller.
How to Choose the Right Ceiling Paint
- Finish: Flat/matt is the go-to for ceilings, low reflection helps disguise surface inconsistencies and joint lines.
-
Job type:
- Full repaint: Choose a ceiling-specific flat for broad, even coverage (e.g., Covermax, Zinsser).
- Spot repair: Use a dedicated stain-covering spray for localised marks (e.g., Rust-Oleum Covers Up).
- Room conditions: Bathrooms or laundries benefit from moisture-tolerant coatings; check each product’s label for suitability.
- Application method: Rollers are king for large areas; aerosols shine for overhead spot fixes and edges you can mask neatly.
- Colour: Classic ceiling white keeps spaces bright; tinting slightly warmer or cooler can harmonise with your wall colour (check the product page for tinting guidance).
Quick Application Tips (Ceilings)
- Prep first: Dust the ceiling, fill small cracks, sand flush and spot-prime any repairs or stains.
- Cut in cleanly: Use a quality brush around cornices, lights and vents before you roll.
- Roll in lanes: Work in consistent sections, keeping a wet edge to avoid lap marks.
- Thin, even coats: Two light coats typically look better than one heavy one.
- Check in daylight: View from multiple angles; touch up while the coat is still workable.
FAQs: Ceiling Paint
Q1: What’s the best finish for ceilings?
Flat/matt is best—it reduces glare, hides minor imperfections and creates a calm, uniform look.
Q2: Can ceiling paint be tinted?
Often, yes. Some ceiling paints can be tinted to a soft white or light pastel. Check the product page/label for tinting instructions before you buy.
Q3: When should I use a stain-covering spray instead of repainting?
Use a spray on localised stains (e.g., water marks) when the surrounding paint is sound and colour-consistent. It’s a fast, tidy solution without rolling the whole room.
Q4: Do I need a primer on ceilings?
Prime new plaster/patches and any stained areas. For sound, previously painted ceilings, a ceiling-specific topcoat is usually fine after cleaning and dulling glossy spots.
Q5: How much paint do I need?
Measure your ceiling (length × width), subtract large openings, and plan for two coats. Coverage varies by product, always check the can for spread rate and recoat times.
Q6: How do I avoid roller spatter overhead?
Use a quality sleeve matched to your surface, don’t overload the roller, and roll steadily. A dedicated ceiling paint can also help control spatter.
Ready to get started?
- Broad refresh: Covermax Ceiling Paint
- Fast stain fixes: Rust-Oleum Covers Up Spray
- Bright, uniform finish: Zinsser Ceiling Paint


